Search Results
156 results found with an empty search
- Trigger Echo Announcements with SmartThings Automations
In the following video, I will explain you can set up a simple virtual switch that can be used in your SmartThings automations to trigger various announcements on your Amazon Echo devices. These announcements can be setup to report the status of your doors, using the status of a multipurpose sensor, or they can announce the arrival of a family member when they enter your homes geolocation. To set-up the virtual switch you'll need to install the code in the SmartThings IDE. The video will provide step-by-step instructions on how to install the code to create a device handler. You can tap on the link below to access Brian Pierron's code for the virtual switch. I have also provided a link to the SmartThings IDE. 🔵 Brian Pierron's Raw Code for Virtual Alexa Switch 🔵 Link to the SmartThings IDE Try out our convenient Online Store to shop Amazon for all of your smart devices. We have made shopping easy by categorizing many of the devices used in my SmartThings automations. 🔵 Shop our Amazon Online Store
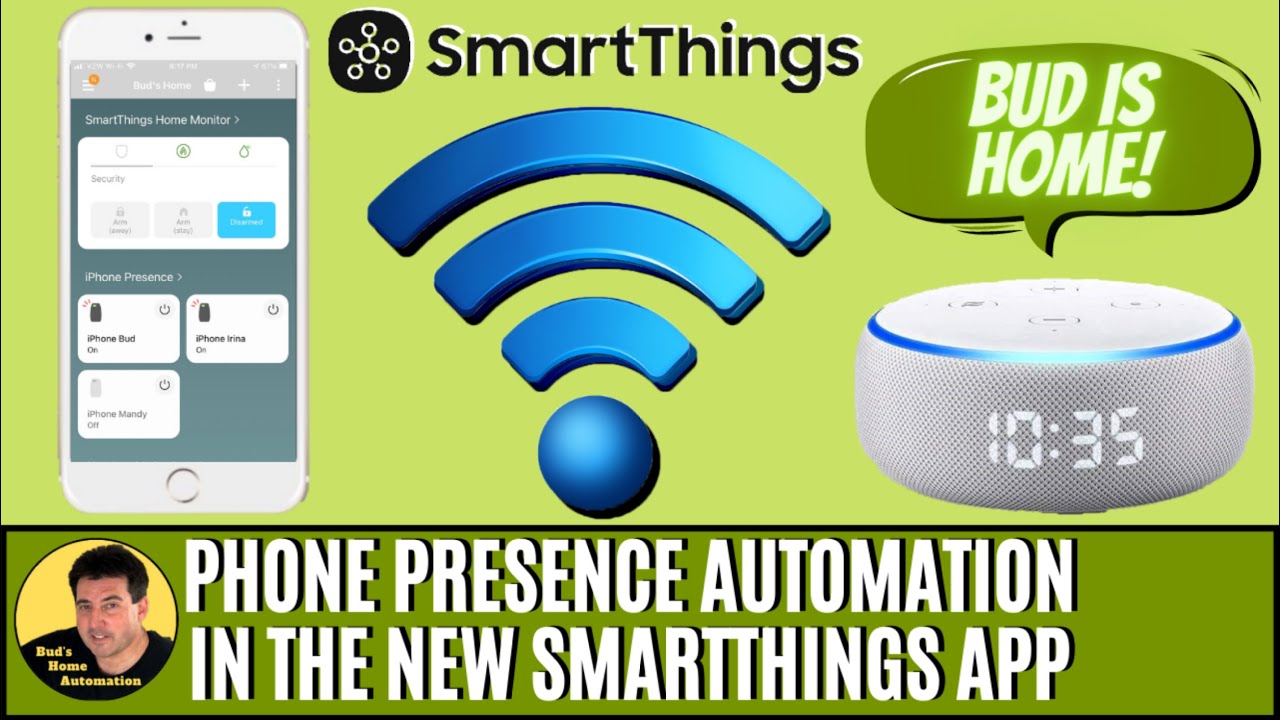
- Use Mobile Phone as Presence Sensor in NEW SmartThings App
Learn how to create a virtual presence device handler that can be used to create an virtual presence switch for each family member's mobile device. Setting up virtual presence device switches gives you the ability to see the status of your mobile phones in the SmartThings App device list. But more importantly, these presence switches provide you with the ability to use the status of your smart phones within scenes and automatons. As a result, you you will now be able to trigger numerous actions based on the arrival and departure of each member's mobile device. You may be asking yourself; didn’t I setup my phone when I installed SmartThings App? It is likely true that you added each member’s smart phone and gave the SmartThings App permission to get the location of each member’s mobile device. So why is necessary to take additional steps? Well I’m glad you asked. The built in mobile presence feature in the new SmartThings app does provide limited ability to use the location of your family members device. The app does this by using the same location services used by your smart device. However, your connected mobile devices and the status of those devices will not display in the SmartThings device list. Therefore, you are limited to using the status of your devices within the Home Monitor’s Security settings. When you setup Security in the Home Monitor, you are instructing the SmartThings App to use the location of your devices to triggered mode changes. You may also set the Home Monitor to trigger lights and alarms based on the status of door and motion sensors, during the time when all of your mobile devices are away from home. However, you are not able to use your mobile phones as a presence sensing device within scenes or automatons. Unless of course, you take a few simple steps to add your devices to the SmartThings device list using the SmartThings IDE. If you are new to Samsung SmartThings, the SmartThings IDE is simply a website which you can access using your established SmartThings login and password. I’ll leave a link to the site below. The SmartThings IDE, or Integrated Development Environment, provides SmartThings users with some tools which can be helpful in managing their SmartThings account. Among other things, the IDE provides the ability to build, manage and publish custom Smart Apps and Device Handlers. In the video supplied below I will show you how to use the IDE to add a nifty little device handler that will give you the ability to set-up each family member’s phone as a virtual device. Once your mobile devices are added to the device list, you’ll then be able to view the status of each member’s device within the SmartThings App. With a simple automation, you’ll be able to switch the presence setting of each device when individual members depart or arrive from your home’s geolocation. Best of all, you’ll also gain the ability to use each mobile device within scenes and automations. Before adding your devices to the IDE, you must first ensure that you have granted SmartThings the needed permissions. SmartThings must be given permission to get the location from each member’s mobile device. To do this you must sign in to the SmartThings app, select Menu icon located in the upper left hand corner of the App, I call this the Hamburger icon. Nest you need to tap the gear icon. Now you want to toggle the switch which reads, “ Get your location from this phone ” to the “ ON ” position. Then it is simply a matter of tapping “ Allow” so that your SmartThings App had permission to access your phone’s location information. It’s important that you apply these settings for each family member device which you intend to use as a presence sensor. Each intended device must have cell service. Otherwise you will not be able to use the device to detect mobile presence. Next you want to verify that your geolocation is properly set. The accuracy of your geolocation is important so you can trigger automations when you leave or arrive home. From the Home screen, you’ll need to tap on the three dots in the upper right-hand corner. Then Tap Manage Location. Next, Tap on the word Geolocation. You may also need to Tap and drag the map to center your Home’s location to the middle of the geofence circle. Finally, you can also adjust the size of the geolocation’s radius to suit your preference. Once everything is set, simply tap Done. Now that we’ve given SmartThings the proper permissions, and set our geolocation, we can now add each mobile phone to the IDE as a SmartThings virtual device. To do this, we are going to use a virtual switch that was developed by Austin Pritchett. Austin is a contributor on the SmartThings Community. I have also provided a link to Austin’s article with provides GitHub integration instructions as well as instructions for manually installing the RAW code. You can view the video provided at the end of this article to see the visual instructions for installing the code. We will be copying the RAW code, and then paste that code into the SmartThings IDE. This will install the Austin’s virtual presence switch as a new device handler. Now assuming that you installed Austin's GitHub code and that you’ve added your virtual phone devices to the IDE, you can now login to your SmartThings mobile app and l see the virtual switches displayed in your list of devices. I listed mine in a group titled iPhone presence. I moved them to the top of the list so that I can view and verify the status of each device. Now it just a matter of creating a couple of simple automations for each member’s device so that each virtual presence switch is turned “on” or “off” when the device returns or departs from the home’s geofence location. When I created my automations, I just name the automations as Bud Home and Bud Away . So if a members mobile device is at Bud’s home, then set the iPhone Bud virtual switch to “ ON ”. If a member’s mobile device is away from Bud’s home, then set iPhone Bud virtual switch to “ OFF ”. Please reference the video below to setup these automations… 🔵 SmartThings Groovy IDE 🔵 Virtual Presence Plus Raw Code 🔵 Austin Pritchett’s Article Bud's Automations Online Amazon Store
- SmartThings Automation Use Smart Phones as Presence Sensors
In my previous article " Use Mobile Phone as Presence Sensor in NEW SmartThings App " I explained how to setup your family’s mobile phones as virtual presence sensors in the NEW SmartThings (ST) App. Once each mobile device set-up, you can use each member’s phone to trigger distinct automations in your smart home ecosystem. In today’s article, I’ll explain how to effectively use those presence sensing devices in a SmartThings automation. If you are new to home automation and you would like to watch a good primer video, then tap on the following link . In that video I provide the three basic steps for creating an amazing smart home. You discover how easy it is to begin your smart home automation journey. Now let’s get into today’s content. If you missed my prior article in which I gave instructions for setting-up your mobile devices as presence sensors, then tap on the following link to review that setup video. You’ll be provided with all you need to setup each family member’s device as a virtual presence sensor. You’ll also gain the ability to use each member’s device in SmartThings Scenes and Automations. This expanded capability will greatly enhance your ability to automate your smart home. In the video below this article, I demonstrate how to use these Virtual Presence Switches created in my former video. The video provides instruction on how to use the ST App to monitor each mobile device for the arrival of each family member. The member’s arrival or departure is determined when the member enters or exits the ST’s hub’s geofence which surrounds your home. When a member’s presence is detected by the SmartThings app, the member’s virtual presence switch is turned on. The status of the presence switch can now be used in a ST automation to trigger actions. If you have a connected voice assistant, such as in Google or Alexa, the status of your virtual switches can also be used to trigger announcements on your Google or Echo voice assistant. Since I use Alexa as a connected voice assistant, I’ll be demonstrating how to set-up family member arrival notifications via Echo device. I’ll be using a Brian Pierron's Simulated “Alexa” Switch to have the ST automation trigger announcements on my Echo device. If you want to have the ability to use your connected voice assistant to make verbal arrival announcements and you have not set-up Brian’s device handler, tap on the following link and watch my video on how to get this set-up. Links mentioned in the video: 🔵 Brian Pierron's Raw Code for Simulated Alexa Switch 🔵 Link to the SmartThings IDE 🔵 Using a Simulated Alexa Switch 🔵 How to Create a Smart Home 101 Shop are Amazon Store for Smart Home devices: 🔵 Bud's Automations Online Amazon Store (US) 🔵 Bud's Automations Online Amazon Store (CA) 🔵 Bud's Automations Online Amazon Store (UK)
- Enable Door Chimes in NEW SmartThings App
In this SmartThings smart home automaton article I show you how to enable the Door Chimes in the new SmartThings App. The door chime automaton is done in the new SmartThings App via the Speaker Companion App. Be sure to check out the following video in which I demonstrate how I set-up the Speaker Companion Smart App to play a chime notification on my Dome Siren. The Dome Siren chime sounds which were once available in the Classic ST App, via a custom device handler, are not accessible in the new ST App. This Dome Siren device handler was made available on the SmartThings Community by developer Kevin Laframboise. However, the chime and bell sounds once available in the Custom SmartThings App can now be replicated in the New SmartThings App using the Speaker Companion App. NOTE: Although the Dome Siren was not available on my Amazon affiliate site at the time of this video, I have found it on other sites and I have provided the relevant links below. Also, I recently installed an Ecolink Zwave Plus Network Security Siren for a client, (see link below). The siren simply plugs in to any 120v receptacle and therefore does not require batteries. The siren easily paired with SmartThings when I plugged it in. the Ecolink device comes with a siren and three other chimes/beeps. I did view some complaints about the low volume level on the Siren. It is set low by default, however, you can adjust the volume by moving an internal jumper. Instructions are provided in the product documentation. Here are some source links for the Dome and Ecolink Sirens: ☑️ Dome Siren: (amazon affiliate site) ☑️ Zwave Plus Network Security Siren: (amazon - EcoLink Siren) ☑️ Dome Siren: (non-affiliate site1) ☑️ Dome Siren: (non-affiliate site2) You can find more great smart home devices on my convenient Amazon Store
- Z-Wave Device Exclusion in the New SmartThings App
Read on to learn some helpful insights about the Z-Wave Device Exclusion utility and the Z-Wave Network Repair utility in the new SmartThings App. I’ll show you how to find these utilities and will also explain why and when you may need to use each utility. When I automated my bathroom exhaust fan/light, ( Video Here ); I installed an EnerWave Z-wave relay switch which I mounted in the gang box behind my wall switch. After several attempts to get the ST App to recognize the relay, I reluctantly pulled out the product documentation to discover that I needed to exclude the relay before adding the device to the ST App. Once I successfully excluded the device, it was immediately recognized by the network and added to the ST App. Therefore, the moral of the story is, if you're having trouble adding a Z-Wave device, and your device refuses connect after several attempts, or if you're having trouble adding a Z-Wave device that was working previously, you likely need to exclude the device to have it recognized by the ST hub. You will need to find, and run the SmartThings " Z-Wave Device Exclusion utility" in order to fix these types of issues. You may be asking yourself, why would I need to exclude or un-pair a device that has never been included to my network in the first place? Your device may have configuration errors which occurred during the pairing process. So if you tried to pair a device, and you were unsuccessful, the device likely has resident errors and is not ready for another pairing attempt. If so, the device must first be excluded before it can be paired. Additionally, the device that you purchased is likely to have been tested at the factory. As a result, the device may be programmed to be associated with a different Z-Wave network. Fortunately, you are able to use the Z-Wave Device Exclusion utility within your network, to exclude Z-Wave devices from any previous network. Once the device is excluded, you then should be able to pair the device to your home network. In my Bathroom automation video, I demonstrate the required steps to find and run the Z-Wave device Exclusion Utility within the old Classic ST App. Let me describe the steps to find and perform a General Z-Wave Device Exclusion I the new app. Before we get started, let me point out that anytime you exclude a Z-Wave device, it is very important that you have the physical device with you, and that you are within range of your SmartThings Hub. Most device manufactures recommend that you be within 10 feet of your Hub. To locate the Z-wave Exclusion utility, open the ST App and select the hamburger menu () located in the upper left-hand corner of the Home screen. Next tap on Devices. Now you’ll want to search for your SmartThings Hub in your list of devices. When found, tap on your hub. If you have a SmartThings Wi-Fi hub, you’ll select your Wi-Fi Hub and then tap on “ Use SmartThings Hub”. Next, tap on “More Options” ellipsis, which is the three dots that are located in the upper right-hand corner of your screen. Next, tap on Z-Wave Utilities. Once you are in the Z-wave Utilities screen you will see the two available utilities. To exclude a Z-wave device you want to tap on “Z-Wave exclusion” utility. The app will prompt you to perform a Z-Wave exclusion on the device. You’ll need to refer to the device's manual for specific exclusion steps. With regard to my EnerWave relay, the Z-Wave exclusion instructions required that I press and release the program button located on the rear of the switch. After the exclusion mode is activated, the app should indicate when the device is successfully removed. Once you receive confirmation that the device has been removed, tap "Done" and follow the specific instructions for adding the device. As mentioned previously, when excluding or adding a device, you’ll want to have the physical device within range of the SmartThings Hub. When adding the EnerWave relay, the guide instructed me to press the programming switch 3 times. This placed my relay switch into learning mode. The switch was quickly included into my wireless network. You will also note that listed on the “ Z-wave Utilities ” screen, there is also a “ Repair Z-wave Network ” utility. What is this for? Should you run it? How often should you run it? Will you damage anything by running the utility? These are all good questions. Let me see if I can provide some answers. Every Z-wave device keeps a “neighbor table” of its own closest neighbors. The neighbor table is used for storing routing instructions. Individual Z-wave devices do not know the entire network. They only know the neighbor that they are to send an outgoing message to as the first step in a relay. The SmartThings hub, keeps all network tables. But since each individual Z-wave device keeps minimal information, it’s the function of the repair utility is to prompt the Hub to tell each Z-wave device to update its personal neighbor table based on the position of the nearest neighboring device. If devices are physically moved around, new devices are added to the network, or old devices are removed from the network, the neighbor tables can get out of date. So the utility performs a bit of housekeeping. It instructs the devices to Say hello to new devices, say goodbye to ones that have left the network or are now out of range, and makes the neighbor tables efficient again. In most Z-wave installations, a Z-wave repair is a “ can’t hurt, might help ” utility. So if you’re seeing too much lag in the network, or you can’t remember if you updated the tables when you removed a device a couple of weeks ago, or if you observe weird behavior on a particular device, you would normally want to run the Z-wave repair utility. How often should you run the utility? If you have several Z-Wave devices and you have never run the utility, it may be helpful to run it to ensure your device neighbor tables are efficient. However, if you don’t currently use Z-wave devices or you never or seldom add or physically relocate your devices, then it is likely not essential that you run the utility. In order to initiate a Z-Wave network repair within the New SmartThings mobile app, follow the previously provided instructions for finding the Z-Wave Utilities screen and simply tap on the “Repair Z-Wave Network” option. You will see a message stating "Z-Wave network repair started." Take care that you do not send any commands to your devices until you receive the " Z-Wave network repair finished " message. The entire repair process may take up to 15 minutes. I have a small number of Z-wave devices and my repair only took about one minute. So I trust I have given you a better understanding about locating and using these Z-wave utilities. If you are interested in sourcing some of the smart home products which I use in my setup, tap on my Amazon Store link . This will give you access to a comprehensive list of recommended devices. I do make a small commission on items that you purchase. The commission does not increase your cost and all sales will help support my efforts so that I can continue to bring you more content.
- SmartThings Exterior Lighting Automation
Coming up is today’s episode, I’ll show you how to setup a simple automation that insures that your nighttime light stays active as long as it takes for Fido to do his business. 🔵 Bud's Automations Online Amazon Store: https://www.amazon.com/shop/budshomeautomationsrepairs Today I am going to show you a fantastic automation that causes your nighttime exterior light to turn on when you open your door, and then turn off when you reenter your home. I learned about this automation feature on one of the forums in which I regularly participate. On of the participants had an automation that set a timer on his back door smart light so that he’d have a period of lighting when taking his dog out at night. However, some of the time his dog took longer than normal leaving dog and master out in the dark. He was wondering how the automation could be changed so that his smart light would stay on for the precise duration of the event. As it turns out, there is an available feature in the SmartThings automaton that will allow a light to turn on when you open a door, and then remain on until you return to re-enter your home. I’ll show the setup, but first let’s look at the devices which you will require for this automation. This automation requires that you have a home internet provider and a SmartThings hub, either version 2 or 3. Your hub must be connected to your home’s router via Ethernet cable or WiFi. By the way, if you haven’t heard, SmartThings has stopped producing hardware and the former hubs and devices are getting scarce.Not to worry, SmartThings and partnered with Aeotec and Aeotec will be making hubs and devices which appear to look and perform like the SmartThings devices. So with your Aeotec or SmartThings hub connected, you’ll also need a Z-wave or ZigBee smart bulb or light switch and a contact sensor. These smart devices would be installed at the exterior door that you intend to use in this automation. As for the light switch, I am using the GE Z-Wave Plus Smart Light. I have used this in-wall switch for several years and it has worked flawlessly. As for the contact sensor, this can be a SmartThings contact sensor, like the one that I have here, or it can any other SmartThings compatible sensor. You can access many SmartThings compatible devices via my Amazon store link. While in my Amazon Store, just click on the “Smart Home Products” category. You’ll find and extensive list of SmartThings compatible devices and for which you can source price and product review information. Please watch the attached video for instructions on the setup.
- SmartThings Trend Setter App - Control Multiple Smart Devices with One Switch
What to use one smart switch to control a group of smart lights? Check out the Trend Setter smart app. It allows you to easily control a large group of smart lights of switches with a single switch! I recommend that you install the Community Installer. With the Community Installer app you can easily install Trend Setter and a host of other Smart Apps. 🔵 Community Installer Instruction Video: 🔵 SharpTools App Instruction Video: 🔵 Bud's Automations Online Amazon Store: https://www.amazon.com/shop/budshomeautomationsrepairs
- Get a Voice Controlled Smart Home With SmartThings & Alexa Echo Devices
Discover the easy steps to connect your SmartThings devices with your Alexa App. Once connected, use your Amazon Echo devices to control your automations and take your smart home to the next level. When SmartThings and Alexa are interconnected you are able to create Alexa Routines that provide voice feedback regarding the status of your smart sensors, switches and lights. You can also give voice commands to your Echo Devices to trigger and control your connected Smartthings devices. Take your home automation to a new level of sophistication by pairing your Samsung SmartThings smart devices with Amazon Alexa. I'll guide you in the easy steps to get you connected. 🔵 Connect the Classic SmartThings App with Amazon Alexa app: 1. Open your Amazon App. 2. Tap the Smart Home menu. (The home icon in the bottom right.) 3. Scroll to "Smart Home Skills" at the bottom. 4. Tap Enable Smart Home Skills. 5. Enter “SmartThings” in the search field. 6. Tap Enable for SmartThings. 7. Log in using your Samsung or SmartThings account. 8. Tap Log in. 9. Choose your SmartThings Location in the From: menu. 10. Tap Authorize. 11. Message: “Alexa has been successfully linked with SmartThings. 12. Tap “done” to begin device discovery. 🔵 Connect the New SmartThings App with the Amazon Alexa app: From the Home screen, touch the Plus (+) icon and select Voice Assistant Touch Amazon Alexa You will automatically be directed to the Amazon App Touch Enable to use for SmartThings Touch Authorize Once authorized, the following message appears: “Alexa has been successfully linked with SmartThings.” Touch x to close the window and begin device discovery ~-~-~-~-~-~-~-~-~-~-~-~-~-~-~-~-~-~-~ 🔵 SmartThings Hub & Sensor Set-up: https://youtu.be/9iyOXN5ApwU 🔵 Shop our online Amazon Store
- Easy Smart Home Automation with SmartThings Classic App - TV Time Routine
In the following video I show you how to set up an easy automation routine within the SmartThings Classic app to activate two different SmartThings Scenes. The first scene sets a low lighting mode perfect for watching TV or Movies. The second scene returns the room lighting to normal state. I use four smart devices in this routine, along with my Generation 2 SmartThings Hub to make the action happen. Additionally, I provide instructions on how to set up two routines in the Amazon Alexa app so the you are able to activate the scenes with voice commands using the fire stick or the echo dot. Automation made easy! Product links: * * GE Enbrighten Z-Wave Plus Smart Light Dimmer (US) GE Enbrighten Z-Wave Plus Smart Light Dimmer (CA) * * SmartThings Multipurpose Sensor (US) SmartThings Multipurpose Sensor (CA) * * SYLVANIA Smart Plug (US) SYLVANIA Smart Plug (CA) * * SmartThings Home Monitoring Kit (US) SmartThings Home Monitoring Kit (CA) ** SPECIALS ** - Amazon Prime Discount!! - Prime Student Deal | 50 Million Songs | Just $0.99 Per Month - Amazon's Most Popular Gift Ideas (Updated Daily) - Amazon's Hot New Releases (Updated Every Hour) - Try Audible and Get Two Free Audiobooks - Audible Romance Free Trial - Access to 16,000 Woodworking Projects Limited Time
- Can it An Alexa Echo Device Really Detect CO Alarms & Breaking Glass?
In the video which follows I will demonstrate how to correctly setup Alexa Guard to detect glass breakage, smoke and CO alarms. I will also explain how you can activate away lighting when you depart from home. Away lighting is a feature programmed within your echo device which mimics the lighting routine that you typically follow when you are active at home. By mimicking away lighting, your alexa devices are able to simulate your presence while you are away from home, and hopefully, this activity will be sufficient to discourage any would be intruders. However, if an intruder is not swayed and they attempt to gain entry by breaking the glass in a door or window, Alexa has another trick up her preverbal sleeve. Your echo devices are designed to detect breaking glass. So in theory, the devices should detect the break in and notify you of a potential intrusion. Amazon also touts the capability to detect both smoke and carbon monoxide (CO) alarms. The activation of alarms should trigger a notification to be delivered to the homeowners smart device. Whether you receive an alarm notification or glass breakage notification, the Alexa app is designed to allow you to playback the actual recording(s) of the detected sound. Furthermore, the app allows the homeowner to listen in live, (a feature called "drop in"), so the you can attempt to determine the current state of your home. Check out the surprising results of my testing of the Alexa Guard feature:
- How to Setup the Free SmartThings Community Installer App
In the video that follows I provide an easy to follow guide for setting up the Free SmartThings Community Installer app. This is a free and must have app which allows you to do one click installation of SmartThings community developed applications and device handlers. Links for Community Installer setup: Community Installer (Free Marketplace) GitHub setup SmartThings Account SmartThings GitHub Integration Guide Echo Speaks Documentation Community Installer GitHub Repository information for Settings Owner: tonesto7 Name: st-community-installer Branch: Master 🚫 DO NOT Click On This Link 🚫
- How to Setup SharpTools to Automate, Monitor & Control SmartThings Devices
This video will show you how to setup the SharpTools Web App so that you can create custom dashboards for your SmartThings devices and also write awesome rule automations within the SharpTools rule engine. You can review the fantastic Dashboard features and Rule making tools offered in the SharpTools web application at the following link: https://sharptools.io